Skip to the adventure

Free public teaching package

Start a Club

Nine games. Six core weeks and three optional extensions. One welcoming place to learn.

Lead a beginner club even if you are learning the games too. Get a setup checklist, real teaching notes, parent letter, printable plans, and ready-to-present slides—all without signup.

Explore complete school programs

No email collection. No account or payment required for these materials. Choose paper, shared devices, or a projector.

Start with simple lines; build toward thoughtful moves.

Your first-session setup checklist

Read once, gather supplies, then start with week 1. Check off items on your printed copy; nothing needs to be submitted.

  • Choose a weekly meeting place, supervising adult, pickup procedure, and 30- or 45-minute slot for six weeks. Follow your setting’s safeguarding and accessibility policies.
  • Read the selected week and rehearse its demonstration before children arrive. No previous game expertise is required; teach only the stated beginner focus.
  • Make pairs or trios. Give each child a turn as mover, explainer, or kind observer; rotate after every two moves. Let children point or speak instead of handling pieces.
  • Gather paper, pencils, a timer, and large two-color counters or labeled paper pieces. Avoid small loose parts where unsuitable. Most handouts give setup instructions rather than exact boards; the Word Tiles extension includes a premium-board template and full bag inventory for making paper tiles.
  • Prepare the week’s board or sketch it using the setup instructions. For palace games, use a suitable physical board for full games; the paper activity is explicitly a soldier-only drill.
  • If using devices, open the optional Try route and check the selected game before the meeting. Use a shared display or rotate one device; the curriculum and paper drills need no account.
  • Set three club agreements: take turns, explain kindly, and pause to ask for help. No timed competition, public rankings, or child contact details are needed.
  • Share the parent letter through your setting’s usual channel. Fill in meeting and pickup details privately. Do not put children’s information on a public projector.
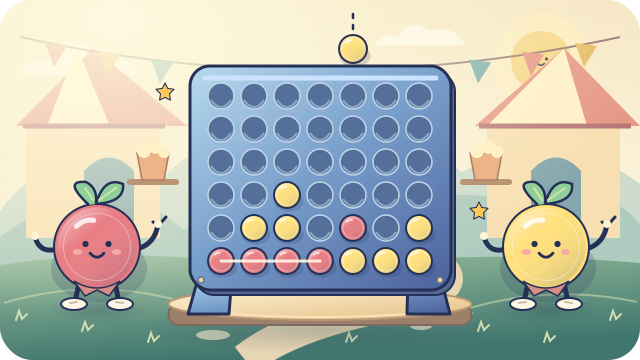
  • Before the first session, lay out the Four in a Row board, model one falling counter, and invite everyone to practise saying, ‘What did you notice?’
Read the ready-to-share parent letter

Parent introduction letter

Hello families,

We are starting a six-week beginner strategy-game club. Children will explore Four in a Row, Omok, Reversi, Chess, Janggi, and Xiangqi, in that order. Our focus is taking turns, noticing patterns, explaining a choice, and encouraging a partner—not winning quickly.

Three optional extension meetings introduce Go, American Checkers, and kidplayclub.com Word Tiles after the six core weeks. Ask the club leader whether these meetings are included in your local schedule.

Each meeting lasts 30 or 45 minutes and includes a warmup, a short demonstration, partner practice, and reflection. Chess and the palace games begin with clearly labeled pawn or soldier drills, not an expectation of mastering a whole game in one meeting.

These kidplayclub.com curriculum materials are free to read, present, and print without signup. Paper activities are included; a child does not need a device, email address, or personal account to take part. Home activities are optional and can be done by talking or drawing.

Please tell the club leader privately about any access needs or pickup arrangements using your setting’s normal contact channel. There is no need to send personal information to kidplayclub.com to use this package.

Meeting place: ____________________ Dates: ____________________

Meeting time and length: ____________________ Pickup arrangements: ____________________

Club leader and setting’s usual contact channel: ____________________

After a meeting, try asking: ‘What did your partner help you notice?’ Thank you for helping us celebrate thoughtful, kind play.

A connected, easiest-first journey

Start with dropping and placing, then flipping, then moving pieces. Later weeks use focused pawn and soldier drills—not full-game mastery in one lesson.

After the six core weeks, try optional Go, American Checkers, and kidplayclub.com Word Tiles sessions. Their guides retain full rules; a short practice mission is not a replacement ruleset. Word Tiles covers hidden racks, word checks, premiums, and endings.

Session length · updates plans, printouts, and slides

Take the whole program with you

Print or use your browser’s “Save as PDF” destination. Includes setup, the parent letter, and all nine teacher/session handouts at the selected length. Word Tiles includes a premium-board template and bag inventory; other weeks give board setup instructions, not exact boards or piece sets.

kidplayclub.com · Free club program with three optional extensions · 30-minute session

Week 1: Four in a Row · Look up, down, and across

Today we can: Take turns and spot a line of four in three directions.

Connect the weeks: Start with one simple action: choose a column. We will carry our line-spotting habit into Omok next week.

Prepare the room

Materials: One 7-column × 6-row board and two colors of counters per pair; paper and pencils work too.

Set up: Start empty. Label columns A–G left to right and rows 1–6 bottom to top. Red starts; partners alternate colors each new game.

These are teaching instructions, not exact printable boards or piece sets. Use a suitable board or the explicitly described paper drill.

Rules to say aloud

  • On your turn, choose a column that is not full. Your counter falls into its lowest empty space; it cannot float above a gap.
  • Make four or more of your color in an unbroken horizontal, vertical, or diagonal line to win. Stop when the first line is completed.
  • If all 42 spaces fill without a winning line, the game is a draw. You cannot move or remove a placed counter.

Teacher demonstration

Core idea: Discs fall to the lowest free square. Four in a line wins.

  1. On an empty board, alternate Red A, Yellow B, Red A, Yellow B, Red A, Yellow C. Pause: Red has three counters in column A.
  2. Ask everyone to point to where another Red counter in A would land. Place it in A4, not A6: Red now has four vertically.
  3. Reset. Sketch four same-color counters across a row and then on a diagonal. Trace each straight line with a finger.

Run the session · 30 minutes

  1. Warmup · 5 minutes: Learn partners’ names and practise passing a counter. Count four spaces together; agree to congratulate careful looking.
  2. Mini-lesson · 5 minutes: Model gravity, alternate turns, and demonstrate the A-column winning line. Ask a child to explain why a counter cannot float.
  3. Buddy practice · 15 minutes: Play untimed partner games. Before each move, check horizontal, vertical, and diagonal lines. After a game, switch first player and name one threat you noticed.
  4. Reflection · 5 minutes: Each child points to one line and says how they knew it counted. Thank a partner; preview placing stones anywhere next week.

Teacher notes & adaptations

  • Common slip: counting a line with a gap. Touch all four neighboring counters together and check they share one color.
  • If children finish quickly, replay rather than start a leaderboard. If time runs out, pause and describe the position; no winner is needed.

More support: Together check one direction at a time. Let the observer point to two possible columns and the mover choose.

More challenge: Before dropping a counter, predict the opponent’s immediate four-in-a-row threat and explain a block.

Limited devices: Use one demonstration screen. Pairs play on paper while one trio tries the digital board; rotate the device after five minutes, not after a win.

Fully offline: Draw a 7×6 grid. Place or draw each counter in the lowest unused cell of its column. Use X and O as well as colors; never erase an earlier move.

Stop at the practice timer even if a game is unfinished. Praise the explanation; a full game or a winner is not required.

Check understanding

Show a column with two counters at the bottom. Can each learner point to the next landing space and trace a valid line of four?

Optional home connection: Draw four dots in a row, a column, and a diagonal. Ask someone to find a line with a deliberate gap.

One rule I can explain: ________________________________________

A kind thing my partner did: __________________________________

Next time I want to try: _______________________________________

Ready-to-present slides · week 1

Project this panel. Select any week above to load its six slides. Tab to the presentation or its controls; use Left/Right arrows, Home/End, or the Back/Next buttons. Arrow shortcuts apply only inside this panel.

Week 1 · Four in a Row · Slide 1 of 6

Week 1: Look up, down, and across

  • Take turns and spot a line of four in three directions.
  • Start with one simple action: choose a column. We will carry our line-spotting habit into Omok next week.
  • Our agreement: take turns, explain kindly, and ask for help.

Keep it simple—or add a hosted classroom

The six-week package and all three extensions stay free and public. Optional game exploration and buddy teaching can complement them; the paper activities stand on their own.

Need hosted student rosters and classroom tools? Those are a separate paid organization service, not a requirement for using this curriculum.

Explore paid organization tools